
How to Use the Starlink App for Perfect Alignment and Obstruction Checks
Setup & Equipment · 12 April 2026
Introduction
Setting up your Starlink kit is an exciting step toward high-speed, low-latency internet, but the physical placement of your dish is the single most important factor in determining your overall performance. While it might be tempting to simply plug everything in and hope for the best, Starlink is designed to work best when it has a clear, unobstructed view of the sky.
To take the guesswork out of this process, Starlink provides a powerful set of tools built directly into the official Starlink mobile app. In this guide, we will walk you through how to use the Alignment and Obstructions tools to ensure your connection is rock-solid from day one.
Why App-Based Setup Matters
Unlike traditional satellite internet, which often relies on a fixed position, Starlink uses a constellation of Low Earth Orbit (LEO) satellites that are constantly moving across the sky. Your dish must be able to "see" these satellites as they pass by. Even a small obstruction—like a single tree branch or a roof edge—can cause frequent micro-drops in your connection, leading to buffering during videos or lag during gaming.
The Starlink app uses your phone's camera and the dish's internal sensors to provide real-time feedback, making it much more accurate than "eyeballing" the placement.
Step 1: Using the Alignment Tool
Once your Starlink kit is plugged in and connected to your Wi-Fi, the first thing you should do is open the app and check the alignment status.
The alignment process is designed to help you orient the dish toward the optimal part of the sky. The app will guide you through a series of steps to ensure the dish is positioned correctly to catch the maximum number of satellites.
How to follow the alignment guide:
- Open the Starlink App: Ensure your phone is connected to your Starlink network.
- Navigate to Alignment: Look for the "Alignment" or "Status" section in the app dashboard.
- Follow On-Screen Prompts: The app will often ask you to move the dish slightly or tilt it in a specific direction.
- Wait for Confirmation: The app will continuously monitor the signal quality as you adjust the position.
Once the dish is in the optimal position, you will see a confirmation screen.
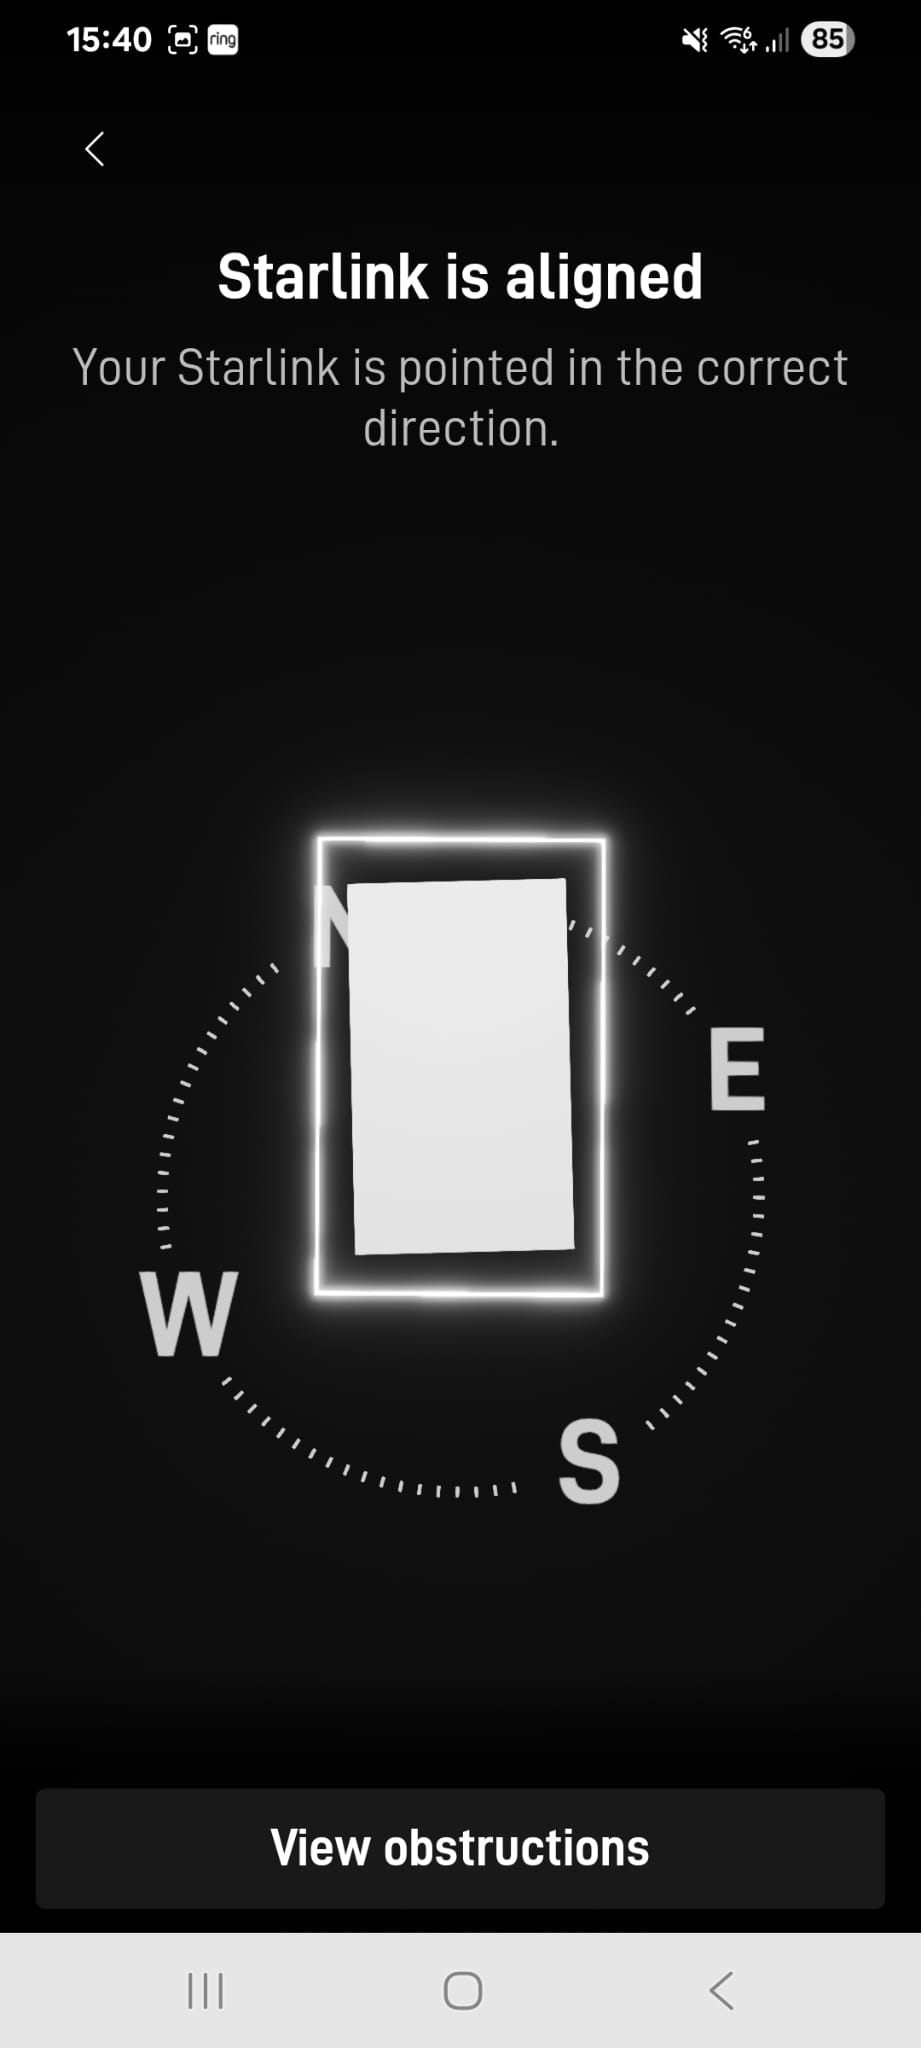
When you see this screen, it means the dish is communicating effectively with the constellation and is positioned to provide the best possible service.
Step 2: Checking for Obstructions
Even if your dish is "aligned," it doesn't mean it's in the perfect spot. An obstruction might not affect the connection right now, but as satellites move through different parts of the sky, a building or tree might block the signal later in the day.
This is where the Obstructions Tool becomes your best friend.
Running an Obstruction Check:
- Select 'Check for Obstructions': Within the app, locate the tool specifically designed for this purpose.
- The Scanning Process: The app will use the dish's data to map out the "view" of the sky. It looks for any objects that might intersect with the path of the satellites.
- Review the Map: The app will provide a visual representation (often a circular map) showing where your obstructions are located.
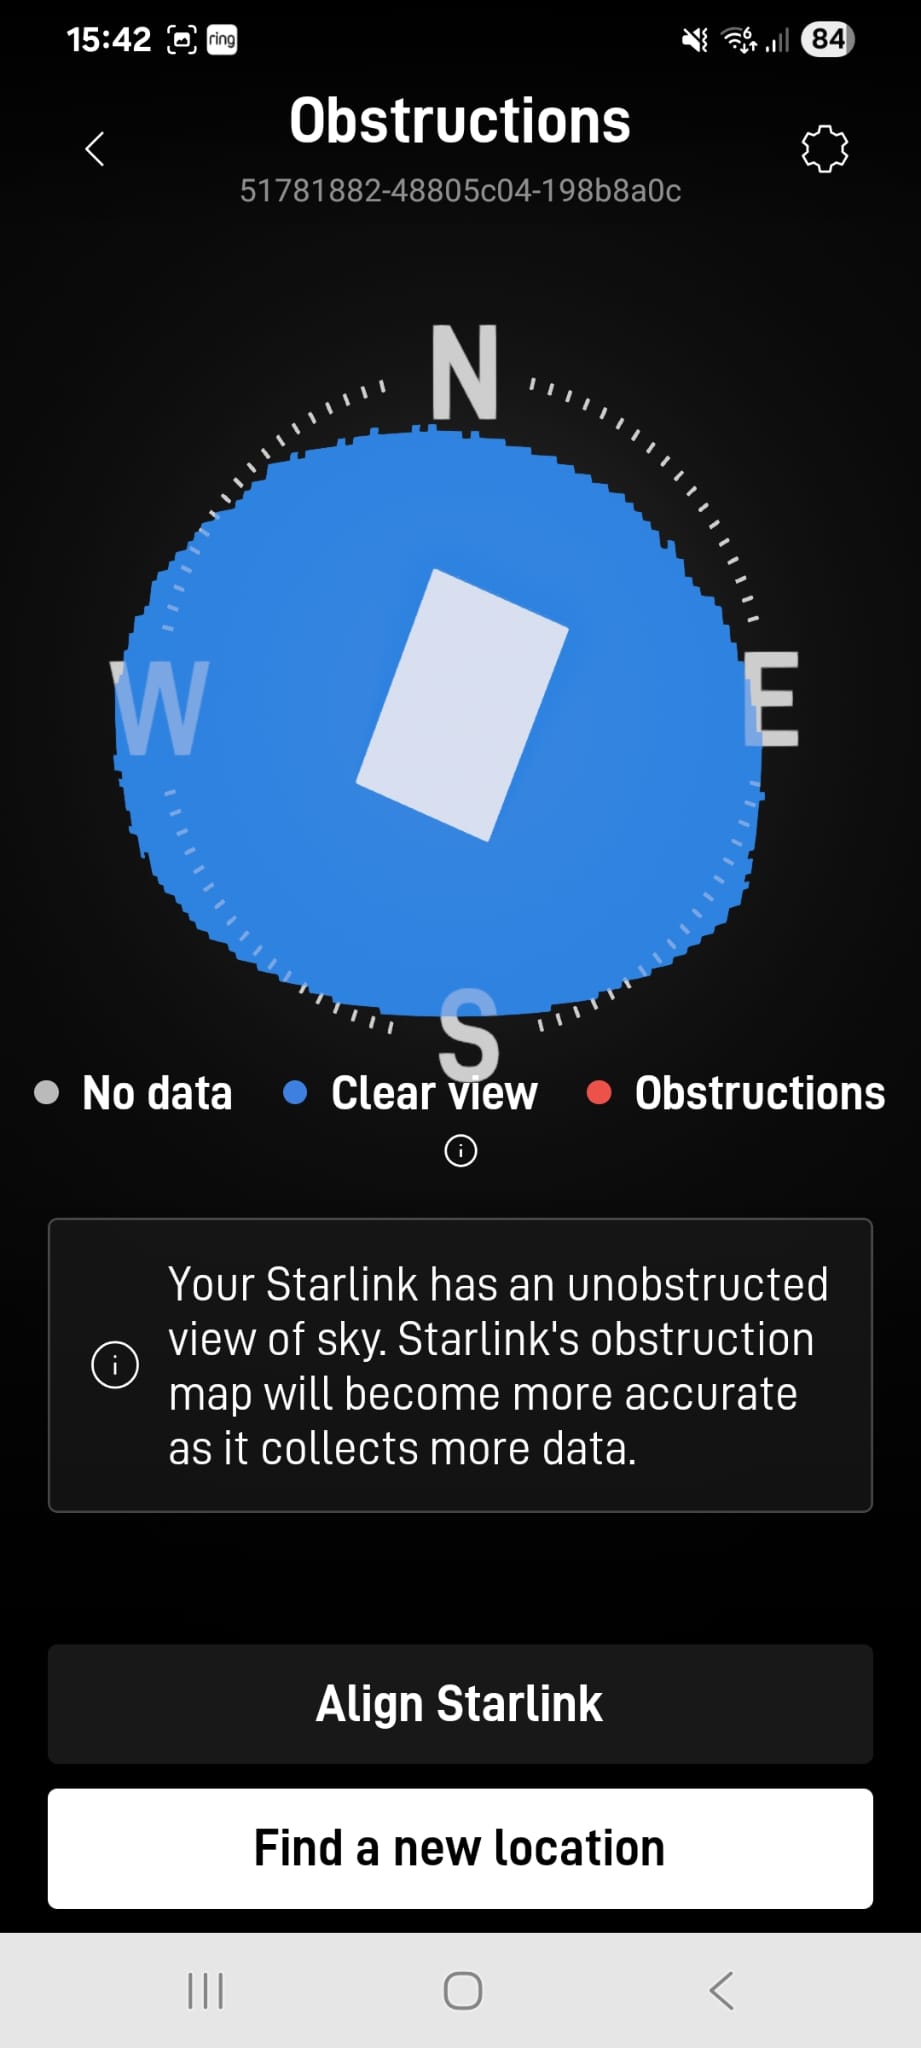
The app will highlight areas of concern. If you see significant colored zones representing obstructions, it means your current location is at risk of signal drops.
What to Do if You Have Obstructions
If the app indicates that you have obstructions, do not ignore them. A "mostly clear" view can still result in a frustrating experience. Here is how to handle it:
1. Relocate the Dish
If you are using a temporary setup (like a tripod or a ground stand), the easiest fix is to move the dish to a more open area. Even moving the dish just a few feet can make a massive difference.
2. Increase the Height
The most common cause of obstructions is nearby trees or rooflines. By mounting your Starlink dish higher up, you can often "see over" these obstacles.
- Roof Mounts: Using a specialized Starlink roof mount can lift the dish above the peak of your house.
- Pole Mounts: If you have a chimney or a sturdy wall, a pole mount can provide the necessary elevation.
3. Prune Trees
If the obstruction is a tree branch, consider pruning it back. While we always recommend physical relocation first, trimming a single problematic branch can sometimes solve the issue without requiring new mounting hardware.
Summary Checklist for a Perfect Setup
To ensure you get the most out of your Starlink service, follow this quick checklist:
- [ ] Power on the kit and wait for the initial connection.
- [ ] Open the Starlink App and navigate to the alignment tool.
- [ ] Complete the alignment process until you see the "Aligned" confirmation.
- [ ] Run the Obstruction Check to scan the entire sky path.
- [ ] Analyze the obstruction map for any significant blocks.
- [ ] Adjust height or position if any obstructions are detected.
By taking these extra ten minutes during setup, you are saving yourself hours of troubleshooting and frustration later on. Happy surfing!